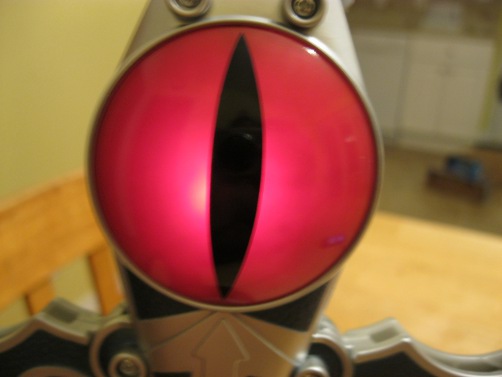
Thanks to ThunderCats.ws boards member Lionar for posting up images and a video for 2011 Sword of Omens!
“Upset just as much as I am that the back of the Sword of Omens doesn’t light up like the front. Problem solved. Just follow the Steps listed below and you can have it light up just like in my video below.”
Lionar says
Upset just as much as I am that the back of the Sword of Omens doesn't light up like the front. Problem solved. Just follow the Steps listed below and you can have it light up just like in my video below.
Thundercats Deluxe Sword of Omens Mod: LED Eye
Things you will need:
-Phillips head screwdriver
-dremel/power drill
-Soldering iron
-Solder (Lead free)
-Bright Red LED (one of the medium sized ones 5mm I think)
1. Disassemble
===========
Take all the screws out and part the two shells/halves of the sword apart like pictured below.
Make sure to put all the screws in a safe place as well as the battery cover and batteries.
2. Innards
========
This next pic will be your best friend and save you a headache. This shows where everything goes and how it should look when you reassemble.
3. Switch and catch
==============
Next put your thumb on this switch and push it up to swing the catch out so the blade can be removed and put out of harms way.
4. Trigger
=======
Remove the trigger assembly. Set aside.
5. Led installation
=============
You will be working in the area primarily. The back of the led and the board it is mounted on.
Your LED will need a good length of wire on it to give it some wiggle room. So that it wont be stretched to the point of breaking.
Next make sure you have your wires connected properly and the positive is to positive and minus is to minus before soldering. Once you do solder your new Red LED onto the respective posts like so.
6. Drilling and mounting
=================
Grab the other halve of the sword that doesn't have the electronics.
Take a dremel or power drill and using a drill bit 1/8 th size and drill a hole in the center most area of this piece. Be careful not the drill out and right through the eye. Also use the drill to widen the hole a bit as well to fit the new led.
This next part call for being somewhat fast with your hands. Super glue around the hole you just drilled. And set the led inside the newly made hole.
7. Reassemble
===========
Once the glue has dried put everything back together(use innards pic above if stuck on where things go back to) and if done right everything should work as it normally does. Expect both sides now light up.
Cat's Pajamas says
Great tutorial, thanks!
IndyCat says
awesome thanks for the tut! Now we just need to make the blade spring loaded!!!! Then it would be flippin amazing!
Lionar says
Lion O of savannah says
BADA$$ LIONAR, well done
Scelestus Unus says
One thing I noticed that Lionar didn't mention is that if you take out the electrics board you will find a light restricting dome that looks like a clear white dome with a pinhole in the middle. It easily pops out and allows the Thundercats symbol to light up slightly brighter.
I'm amazed because I did almost the exact same mod as you before seeing this thread. I was going to unscrew the eyes and place magnets on the back of them so I could switch out the eyes on either side, but it wasn't very practicle.
I decided to add a light to the back, but since I can't solder I took the led from a bubble machine fish keychain, ran it to the cats eye, and drilled a hole for the new button on the hilt of the sword. So while I have to push another button to get it to work, my cats eye lights up as well.
BWDinobot says
awesome. Now I need to go get that sword. Thanks for a great tutorial on how to do this.
englishw says
Amazing! I'm going to have to try it myself! Thanks!
shmashwitdaclub says
very cool!
Dedboy says
Very nice job! Well done!!! :]